 Creating
a Parking Area
Creating
a Parking AreaTwo parking tools, Parking Area and Parking Along Path, create parking spaces automatically within a defined area or along a path. The parking tools allow for islands, accessible spaces, head-in (angled) parking, parallel parking, and access lanes; a parking schedule counts the total number of parking spaces for each type of parking tool.
Alternatively, draw a polyline and then select the Create Objects from Shapes command (see “Creating Objects from Shapes” on page 273).
Parking areas and parking along path objects can be sent to a site model surface with the Send to Surface command, but they do not modify the site model.
A third parking tool, Parking Spaces, is a basic tool for creating simple parking space graphics.
Click here for a video tip about this topic (Internet access required).
~~~~~~~~~~~~~~~~~~~~~~~~~
Creating
a Parking Area
To create a parking area:
1. Select the Parking Area tool from the Site Planning tool set.
2. Click to begin drawing the parking polyline; click to set each polyline vertex. Click the mouse at the start point to complete a closed polyline, or double-click the mouse to create an open polyline. For more information on polylines, see “Polyline Tool” on page 294.
If this is the first time the object is inserted in this session, the Object Properties dialog box opens. These parameters apply to subsequent placements of the object and can be changed in the Object Info palette. Click OK.
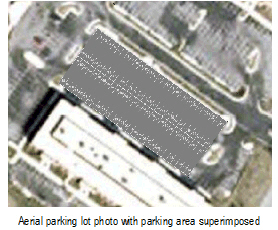
3. The parking spaces are automatically created within the area defined by the polyline.
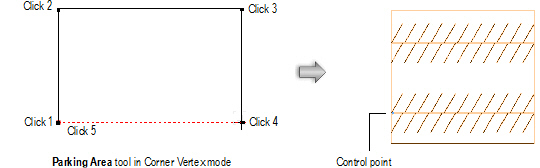
Once created, the parking area can be edited by several methods.
• Adjust the parking space origin by dragging the parking area control point.
• Reshape the parking area polyline with the Reshape tool.
• Set a solid fill color for the parking area and a solid pen color for the space numbers through the Attributes palette.
• Change the parking space numbering font, size, and style with the Text menu, or assign a text style.
• The parking area displays in a 3D view; if desired, assign a texture to the parking area with the Render tab of the Object Info palette (Renderworks required).
Parking area parameters can be edited in the Object Info palette.
Click to show/hide the parameters.
~~~~~~~~~~~~~~~~~~~~~~~~~
 Creating
Parking Islands
Creating
Parking IslandsMany parking areas include islands where trees are planted or parking spaces are otherwise separated. By using the Clip Surface command, the parking area can be adjusted to account for parking islands, or for accessible parking. The parking spaces automatically adjust for the presence of the parking islands.
To create parking islands within a parking area:
1. Draw the 2D clipping objects on the parking area.
2. Select the clipping objects and the parking area. See “Recortar Superfície” on page 1077 for more information.
3. Select Modify > Clip Surface.
The parking area is clipped, removing the areas under the clipping objects.
4. Delete the clipping objects.
The parking area automatically adjusts for the removed spaces, renumbering the parking spaces.

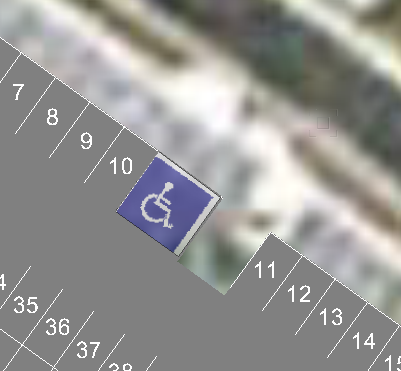
Although the Parking Space tool offers several parameters for easily defining accessible parking spaces, the Clip Surface technique can also be used to create accessible spaces. Do not remove the clipping object after clipping; apply the same fill color and then apply an accessible parking graphic image to the area. Accessible spaces created this way are not counted in parking space reports.
~~~~~~~~~~~~~~~~~~~~~~~~~
 Creating
Parking Along a Path
Creating
Parking Along a Path
To create parking along a path:
1. Select the Parking Along Path tool from the Site Planning tool set.
2. Click to begin drawing the parking polyline path; click to set each polyline vertex. Double-click the mouse to create an open path polyline, or click at the start point to complete a closed polyline. For more information on polylines, see “Polyline Tool” on page 294.
If this is the first time the object is inserted in this session, the Object Properties dialog box opens. These parameters apply to subsequent placements of the object and can be changed in the Object Info palette. Click OK.
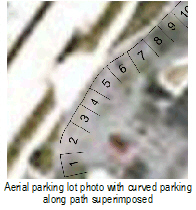
3. The parking spaces are automatically created along the polyline path.

Once created, the parking along path object can be edited by selecting the parking object; then select Modify > Edit Parking Along Path and reshape the parking area polyline with the Reshape tool; click Exit Path to return to the drawing.
Parking along path parameters can be edited in the Object Info palette.
Click to show/hide the parameters.
~~~~~~~~~~~~~~~~~~~~~~~~~
 Creating
Parking Spaces
Creating
Parking Spaces
To create basic parking spaces:
1. Select the Parking Spaces tool from the appropriate tool set:
• Architect and Landmark: Site Planning tool set
• Spotlight: Building Shell tool set
2. Click once to place the parking spaces object. Click again to set the object rotation.
If this is the first time the object is inserted in this session, the Object Properties dialog box opens. These parameters apply to subsequent placements of the object and can be changed in the Object Info palette. Click OK.
3. A basic parking spaces object is placed in the drawing.
Parking space parameters can be edited in the Object Info palette.
Click to show/hide the parameters.
The Parking Space tool is available for Vectorworks Fundamentals software but is not present in the Fundamentals workspace. It can be added to the Fundamentals workspace (see “Creating or Editing Workspaces” on page 1827).
~~~~~~~~~~~~~~~~~~~~~~~~~
 Creating
Parking Reports
Creating
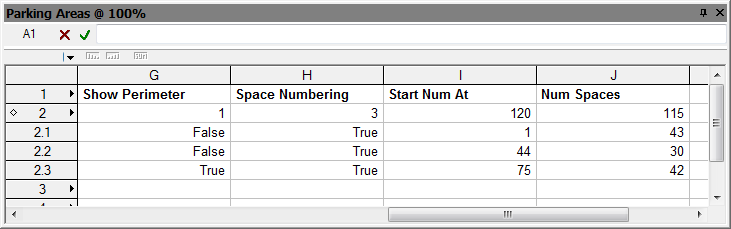
Parking ReportsParking report worksheets can be created for each type of parking tool: parking areas, parking along path objects, and parking spaces. If using a combination of parking types, a report may be needed for each type.
To create a parking report schedule:
1. Select Tools > Reports > Create Report.
2. Select the type of parking from the Listing objects with record list, and select the columns to include in the worksheet.
See “Creating Reports” on page 1312 for more information.
3. Click OK to create the report.
The worksheet calculates the total number of spaces for all parking objects of the same type.
~~~~~~~~~~~~~~~~~~~~~~~~~
