Efeitos de Apresentação
Efeitos de Imagem
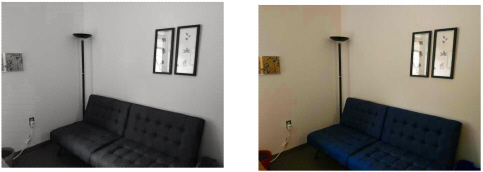
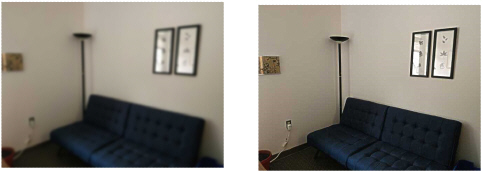
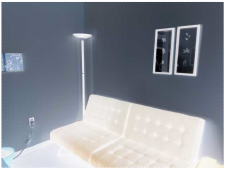
O recurso de efeitos de imagem permite que imagens importadas
(bitmaps), recursos de imagem, viewports, texturas de imagem e imagens
de fundo Renderworks baseados em imagem sejam facilmente aprimorados sem
exigir uma apresentação completa demorada ou a necessidade de exportar
para um programa de imagem externo. Mais de um item pode ser selecionado
e ajustado ao mesmo tempo.
Use a ferramenta Conta Gotas para Transferring Attributes, incluindo efeitos
de imagem, entre bitmaps ou viewports.
Para ajustar efeitos de imagem para um bitmap, recurso
de imagem, imagem importada ou viewport selecionado:
1 Fazer
um dos seguintes:
• Ao
Importing Image Files,
clicar em Efeitos de Imagem na janela de diálogo Opções de Importação
de Imagem.
• Selecionar
um objeto bitmap, selecionar Aplicar Efeitos de Imagem e, em seguida,
clicar em Efeitos de Imagem na Paleta Info de Objeto.
• Ao
Creating Resources
clicar em Efeitos de Imagem na janela de diálogo Opções de Importação
de Imagem.
• Quando
um recurso de imagem existir, clique-direito no mesmo no Administrador
de Recursos e selecionar Editar Efeitos de Imagem nos Resource Viewer Menus.
• Ao
modificar as Viewport
Properties, selecionar Aplicar Efeitos de Imagem e, em seguida,
clicar em Efeitos de Imagem na Paleta Info de Objeto ou selecionar Editar
Efeitos de Imagem no menu contextual. O viewport deve ser apresentado
com o OpenGL ou um modo Renderworks e ser atualizado.
• Ao
criar um sombreador de cor baseado em imagem e Importing Images for Color Shaders, clicar
em Efeitos de Imagem na janela de diálogo Editando Cor da Imagem.
• Ao
Creating Image Backgrounds,
clique em Efeitos de Imagem na janela de diálogo Editar Imagens de Fundo.
A janela de diálogo Efeitos de Imagem abrirá.
► Clique
para exibir/ocultar parâmetros
2 A
área de visualização exibe as alterações na imagem ou viewport quando
os controles deslizantes são ajustados. Clicar em Preview para ver as
alterações no desenho, para uma imagem ou viewport existente.
3 Clicar
em Aplicar.
Quando os efeitos de imagem são acessados ​​a
partir da Paleta Info de Objeto, os efeitos podem ser ativados e desativados
clicando em Aplicar Efeitos de Imagem.
 Apresentação
de Croqui
Apresentação
de Croqui
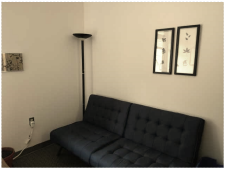
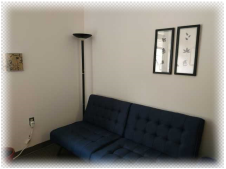
Os produtos da Série Vectorworks Design incluem um modo
de apresentação de croqui que aplica um efeito de desenho ou croqui feito
à mão a objetos 2D e 3D em qualquer projeção. Os efeitos de croqui baseados
em vetor são salvos como recursos editáveis são aplicados diretamente
aos objetos em um desenho. Os efeitos de esboço também podem ser aplicados
a hachuras e viewports de camada de folha e podem ser usados na apresentação
de linhas ocultas.
Ao contrário do Artistic Renderworks, a apresentação
de croquis pode ser aplicada a objetos 2D e objetos individuais podem
ter estilos de esboço específicos. Efeitos de croqui não podem ser aplicados
a planilhas, texto, loci ou luzes.
~~~~~~~~~~~~~~~~~~~~~~~~~
Setting
the Default Sketch Style
Applying
the Default Sketch Style
Editing
Sketch Styles
Creating
Custom Sketch Styles
Applying
Sketch Styles to an Object
Applying
Sketch Styles to Hatches
Applying
Sketch Styles to Viewports
Sketching
with Hidden Line Rendering
 Setting the Default
Sketch Style
Setting the Default
Sketch Style
Command |
Path |
Sketch Options |
View > Rendering |
To quickly apply a sketch style to all objects in the
current design or sheet layer, specify a default sketch style. Specifying
the sketch style in a design layer applies the default to all design layers
and sheet layers in the file. For sheet layers, applying a default sketch
style applies only to objects placed on the sheet layer, overriding the
document default sketch style; viewports also have individual sketch style
settings (veja Applying
Sketch Styles to Viewports).
Sketch styles are provided in libraries (a selected
sketch style is automatically imported into the current file and displays
in the Resource Manager; veja Concept: Resource Libraries). The following sketch
styles are pre-defined, and can be selected as a default sketch style.
Custom sketch styles that have been added to the file also display in
the Resource Manager and can be selected as a sketch style (veja Creating Custom Sketch
Styles).
Unused sketch styles can be purged; veja Purging Items from
a File.
Sketch style resources do not display in the Resource
Manager until a sketch-related option is selected for the first time.
Default Sketch Style |
Descrição |
No Sketch |
Does not apply a sketch style; useful
for overriding an applied sketch style (veja Applying Sketch Styles to an Object)
|
Careful |
Uses many small wobble points and minor
variations from the actual endpoints
|
Certain |
Uses many small wobble points and specifies
more overstrike
|
Quick |
Uses few wobble points, with more distance
between them
|
Rough |
Uses many wobble points
|
Tentative |
Uses many small wobble points and a high
amount of understrike
|
To specify the default sketch style:
1 Select
the command.
The Sketch Options dialog box opens.
2 Select
the default sketch style from the list.
► Clique
para exibir/ocultar parâmetros
Select View > Rendering
> Sketch to apply the default sketch style.
~~~~~~~~~~~~~~~~~~~~~~~~~
Applying
the Default Sketch Style
Editing
Sketch Styles
 Applying the Default Sketch Style
Command |
Path |
Sketch |
View > Rendering |
To apply the default sketch style to the current design
or sheet layer:
Select the command.

~~~~~~~~~~~~~~~~~~~~~~~~~
Setting
the Default Sketch Style
Editing
Sketch Styles
Creating
Custom Sketch Styles
Applying
Sketch Styles to an Object
 Editing
Sketch Styles
Editing
Sketch Styles
Command |
Path |
Sketch Options |
View > Rendering |
Sketch style can be edited and renamed.
Sketch styles do not display in the Resource Manager
until a sketch-related option is selected the first time.
To edit a sketch style:
1 Select
the command.
The Sketch Options dialog box opens.
2 Select
the command.
3 Click
Edit.
4 The
Sketch Style Editor dialog box opens. You can edit the sketch edge and
end point settings, and rename the style. The preview graphic provides
help with editing.
► Clique
para exibir/ocultar parâmetros
Alternatively, from the Resource Manager, right-click
on the resource, and select Edit from
the context menu. Sketch styles can also be deleted and/or replaced from
the Resource Manager (veja Deleting
or Replacing Resources).
~~~~~~~~~~~~~~~~~~~~~~~~~
Applying
the Default Sketch Style
Creating
Custom Sketch Styles
 Creating
Custom Sketch Styles
Creating
Custom Sketch Styles
The Vectorworks program includes several default sketch
styles, but you can also create custom sketch styles.
To create a custom sketch style:
1 From
the Resource Manager, click New Resource,
select Sketch Style, and then click Create.
Alternatively, from the Resource Manager, select Sketch Styles from the
list of resource types on the tool bar, and click New
Sketch Style.
2 The
Sketch Style Editor dialog box opens. Specify the sketch style settings
as described in Editing
Sketch Styles.
The new style displays in the Resource Manager
and is available in sketch style lists.
~~~~~~~~~~~~~~~~~~~~~~~~~
Editing
Sketch Styles
Setting
the Default Sketch Style
Applying
the Default Sketch Style
 Applying
Sketch Styles to an Object
Applying
Sketch Styles to an Object
Command |
Path |
Sketch |
View > Rendering |
Each object can have its own sketch style, overriding
the sketch style applied to the current layer. Apply the “No Sketch” style
to objects that should never be sketched.
To apply a sketch style to one or more objects:
1 Select
the command.
2 Select
the object.
Groups and symbols cannot have a sketch style applied
directly; edit the group or symbol first.
3 On
the Render tab of the Object Info palette, the Sketch list
displays the current document default sketch style. Select a different
style to use in sketch rendering mode, or select No Sketch to never apply
a sketch style to the object.
Alternatively, from the Resource Manager, double-click
on the resource or drag the resource onto an object to apply it.
Objects that override the default design layer sketch
style also override the default sketch style on a sheet layer.

~~~~~~~~~~~~~~~~~~~~~~~~~
Setting
the Default Sketch Style
Applying
the Default Sketch Style
 Applying
Sketch Styles to Hatches
Applying
Sketch Styles to Hatches
Command |
Path |
Hatch |
Modify |
Each hatch resource can have its own sketch style, overriding
the sketch style applied to the current layer. Apply the “No Sketch” style
to hatch resources that should never be sketched.
To specify a hatch sketch style:
1 Select
an object that has a hatch resource applied.
2 Select
the command.
The Hatches dialog box opens. For more information
on hatches, veja Defining
Hatches.
3 Select
a hatch and click Edit.
The Edit hatch dialog box opens.
4 The
document default displays as the Sketch Style.
Select a different style to use in sketch rendering mode, or select No
Sketch to never apply a sketch style to the hatch.
Alternatively, from the Resource Manager, right-click
on the resource, and select Edit from the
context menu.
~~~~~~~~~~~~~~~~~~~~~~~~~
Setting
the Default Sketch Style
 Applying
Sketch Styles to Viewports
Applying
Sketch Styles to Viewports
You can apply a default sketch style to a sheet layer;
this sketches the objects on the sheet layer, but it does not sketch the
viewports on the sheet layer. Each sheet layer viewport can have its own
sketch style, making it easy to present designs with different sketched
looks.
A sketch style cannot be directly applied to a design
layer viewport, but it can be applied to the layer of the design layer
viewport.
To apply a sketch style to a sheet layer viewport:
1 Select
the viewport.
2 On
the Shape tab of the Object Info palette, select Sketch from the Rendering list. Click Render
Settings to select the viewport default sketch style.
If you are creating a viewport, select Sketch from
the Rendering list in the Create Viewport
dialog box, and then click Render Settings
to select the viewport default sketch style.
The Sketch Render Settings dialog box opens.
Select a sketch style for the viewport.
► Clique
para exibir/ocultar parâmetros
The selected viewport sketch style overrides the default
document sketch style for any objects within the viewport, including the
crop object, referenced design layers, and any annotations.
~~~~~~~~~~~~~~~~~~~~~~~~~
Editing
Sketch Styles
Creating
Sheet Layer Viewports
 Sketching
with Hidden Line Rendering
Sketching
with Hidden Line Rendering
The default document sketch style can be applied to
hidden line, dashed hidden line, and final shaded polygon rendering modes.
To apply a sketch style to hidden line rendering:
1 Select
View > Rendering > Line Render Options.
The Line Render Options dialog box opens.
2 Select
Sketch Hidden Line Results, and select the
sketch style from the list.
The selected sketch style is applied in hidden line,
dashed hidden line, and final shaded polygon rendering modes.
To apply a sketch style to the hidden line rendering
of a sheet layer viewport:
1 Select
the viewport, and then select a hidden line rendering mode from the Rendering list in the Object Info palette.
2 Click
Render Settings.
The Hidden Line Render Settings dialog box opens.
3 Select
Sketch Hidden Line Results, and select the
sketch style from the list.
The selected sketch style is applied in hidden line,
dashed hidden line, and final shaded polygon rendering modes.
~~~~~~~~~~~~~~~~~~~~~~~~~
Setting
the Default Sketch Style
Rendering
Modes